How to Prepare for Breastfeeding

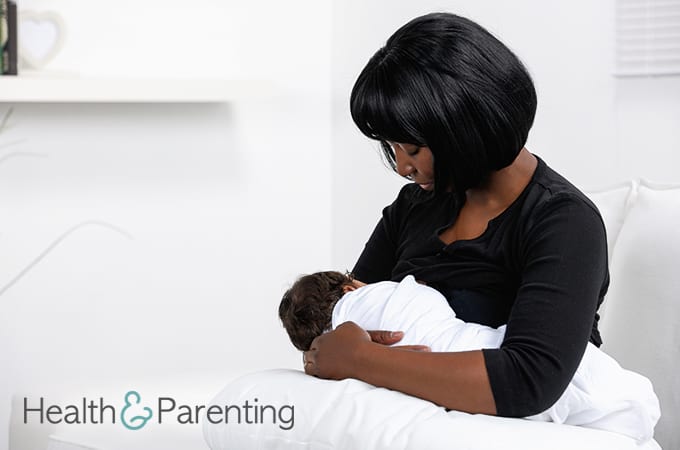
Breastfeeding can be a daunting experience. There’s no training – you have to learn on the job. You don’t arrive for your first day feeling fresh and smart, you are exhausted from labour and probably look as far from smart as you could imagine. To top it off, your boss is a tiny human whose only communication is crying. It’s no wonder you’re feeling stressed and terrified, that’s natural. Here are some helpful tips to help you prepare for breastfeeding:

  1. Know your stuff – obviously you can’t try breastfeeding until the baby arrives, but you can educate yourself. There are plenty of DVDs, online videos, and informative articles filled with tips and hints on how to breastfeed. You don’t need to memorise all the information you can find online, but it doesn’t hurt to arm yourself with a bit of background knowledge. If nothing else, the information you find about the benefits of breastfeeding may empower you to keep trying in the early days.
  2. Prepare yourself – most women find breastfeeding hard work at the beginning. Some babies struggle to latch correctly, some women find the long hours exhausting, and others find the let down painful. Prepare yourself that it might be a tough few weeks, but that once you work through the hard part, it should get easier.
  3. Support system – you’ll need a support system in place during the first few exhausting weeks of breastfeeding. If you have any friends or family members who have breastfed, or who will support you to breastfeed, then you should look to them for support. Avoid the people who will tell you to formula feed your baby if this isn’t what you want to hear.
  4. Stock up – nipple cream is a useful item to have in the house during those early weeks. You may also find a breastfeeding pillow helps you to get the baby in the best position to latch on. See if you can borrow a breastfeeding pillow from a friend to save money.
  5. Set up a breastfeeding station – for this, you’ll need a DVD box set or selection of films, your smartphone or tablet, magazines, books and whatever else you may need to stay entertained during the early weeks. You may find yourself set up in the early hours because babies tend to be nocturnal for the first couple of weeks, so make sure you have plenty of entertainment to hand. You may also benefit from keeping a bottle of water and some snacks at your breastfeeding station, as well as blanket and pillows for comfort.
  6. Utilise your other half – ask your partner to support you during breastfeeding. This could mean offering moral support, or it could be physically running round the house getting you drinks and food while you breastfeed. You will find you are hungrier and thirstier than usual during the first few weeks of breastfeeding. During the early days, you could be feeding for up to eight hours a day, so ask your partner to take on extra duties around the house during this time.
  7. Learn the cues – latching on is more difficult when the baby is crying, so try to breastfeed before your baby starts screaming. Early feeding cues include opening or licking their lips, sucking on fingers, tongue, hands. Other cues include rooting for a nipple, repositioning for feeding, pulling at your top and fidgeting. If you offer the breast when you see any of these cues, you will avoid the hunger cries that can make feeding more difficult.
  8. Get help – lots of women struggle with breastfeeding, please don’t feel embarrassed to get help. Your local hospital should have a lactation consultant on staff who will be able to offer help and advice to aid your breastfeeding. The lactation consultant will be able to diagnose any feeding problems and help you to overcome them.

Written by Fiona, proud owner of a toddler, @fiona_peacock

This information is not intended to replace the advice of a trained medical doctor. Health & Parenting Ltd disclaims any liability for the decisions you make based on this information, which is provided to you on a general information basis only and not as a substitute for personalized medical advice. All contents copyright © Health & Parenting Ltd 2018. All rights reserved.

The Facts About Cloth Nappies / Diapers

Once a product reserved for hardcore eco-mums, cloth nappies (diapers) are now growing in popularity. In fact, they’ve become something of a fashion statement for your baby’s bottom. Michelle Williams, Julia Roberts and Gwyneth Paltrow are all celebrity fans of cloth nappies. There are lots of reasons why people opt for reusable nappies over disposables, here we look at some of the main ones:

Better for the planet:

  • During his first year of life, your baby will need 3000 nappy changes. That’s a lot of nappies! If you’re using disposables, that’s a lot of rubbish.
  • Each disposable nappy takes at least 200 years to decompose. In the UK, eight million disposable nappies end up in landfill each year.
  • Once in landfill, the disposable nappies release methane. Methane is widely considered to be the worst greenhouse gas because it reaches the atmosphere so much quicker than other greenhouse gases.

Better for your purse:

  • If you’re looking at the price per nappy, you might think cloth nappies are crazily expensive. Remember though, each nappy will be used countless times, unlike a disposable nappy which will just be used once.
  • It is estimated that disposable nappies will cost you around £1000 / $1,500 USD from birth to potty training. Cloth nappies, on the other hand, will set you back around £300 / $450 USD for a kit. Of course you then have to factor in washing and drying, but even then it will be less than using disposables.
  • See it as an investment. Once a disposable nappy has been used, it needs to be chucked out, but a cloth nappy can be used time and time again. You will be able to use them on more than one child, and will even be able to sell them on second hand when you’re finished with them.

Better for baby:

  • Lots of chemicals are used during the production of disposable nappies. You can buy organic cloth nappies that contain no chemicals.
  • Cloth nappies look great. Gone are the days of simple terry squares with giant safety pins. Now cloth nappies are available in a whole array of bright colours and fun designs. You can even get them personally embroidered with your baby’s name.

If you aren’t sure whether cloth nappies are for you, you can borrow some for free from your local cloth nappy library. There are cloth nappy libraries across the country offering a selection of brands and styles for you to try for free. This will give you the chance to try out the nappies, without spending lots of money. It will also help you to choose the right brand and style for your baby.

Written by Fiona, proud owner of a toddler, @fiona_peacock

This information is not intended to replace the advice of a trained medical doctor. Health & Parenting Ltd disclaims any liability for the decisions you make based on this information, which is provided to you on a general information basis only and not as a substitute for personalized medical advice. All contents copyright © Health & Parenting Ltd 2018. All rights reserved.

How Accurate is Your Pregnancy Due Date?

During your first prenatal visit that confirms pregnancy, your doctor will also provide you with something pretty significant, which is your DUE DATE!

This is a special date, that in your mind will become so solidified with meaning that you will spend the bulk of your time over the next nine months in serious countdown mode to this particular ONE DAY!

But just how accurate is your pregnancy due date?

When your doctor gives you a due date, they are taking into consideration a variety of factors. The most important of which is the date of your last menstrual period. From that date, they will try – using broad generalizations, to figure out when you ovulated – and thus exactly when you became pregnant. Even if you know the exact date that you became pregnant – you might be off by a few or more days to the time when implantation actually occurred. Since every woman’s body operates on its own unique schedule – using the date of your last menstrual period to come up with your due date, is quite simply NOT 100% accurate and is just the best generalized way to estimate how far along you are and when you might deliver your baby.

Additionally, as you progress through the pregnancy and your doctor begins to measure the size of your uterus (fundal height), uses Doppler technology and Ultrasound to check on the progress of the baby, your due date may change considerably. In many cases, your due date may change several times throughout your pregnancy. Sure, this can be frustrating, and even though you know in the beginning of your pregnancy that your due date is only a mathematical calculation not a certainty – you might find yourself frustrated. The reality is that only as few as 5% of women give birth within a day or two of their ‘due date.’

In fact, the good news is that around 80% of all women deliver between the 37th and 40th week of pregnancy, which means your baby could be here sooner than you expect. And likewise, most physicians will safely allow a woman to sail 2 weeks past her due date if she and the baby are doing well before initiating any sort of labor inducement.

One of the beauties of pregnancy and childbirth is that we as humans, learn to recognize that we do not have control over every little thing in our lives. You’re little one will arrive on exactly the day when he or she is ready to come. While keeping track of your due date gives you something to look forward to, and count down to – you shouldn’t regard the date as something etched in stone.

Written by Stef, Mother of 4 @MOM-Spirational

This information is not intended to replace the advice of a trained medical doctor. Health & Parenting Ltd disclaims any liability for the decisions you make based on this information, which is provided to you on a general information basis only and not as a substitute for personalized medical advice. All contents copyright © Health & Parenting Ltd 2018. All rights reserved.

Postpartum Depression: How to Spot It

As many as 15% of new mums suffer from postpartum mood disorders, including postpartum depression. You may have heard people talk about the baby blues, and the impact of postpartum hormonal changes on mood, but postpartum depression is more than that.

It’s important to be able to recognise the signs of postpartum depression in yourself and others, because the sooner this condition is diagnosed, the sooner treatment can begin.

It is not known what causes postpartum depression. Having a baby is a life-changing and stressful event. Exhaustion and stress are almost inevitable as you adjust to life as a new parent, and this may play a part in the onset of postpartum depression. Hormonal changes also contribute. You have an increased risk of developing postpartum depression if you:

  • have a family history of depression
  • have a personal history of depression or other mood disorders, such as bipolar disorder

Symptoms of postpartum depression

The symptoms of postnatal depression most often begin during the first two months after the birth, but may start any time in the first year postpartum. You may experience some of the following symptoms:

  • persistent low moods
  • persistent feeling of sadness
  • loss of interest in the world around you
  • inability to feel joy
  • fatigue
  • trouble sleeping
  • inability to concentrate and/or make decisions
  • low self-confidence
  • loss of interest in food, or comfort eating
  • feelings of guilt
  • suicidal thoughts
  • self-harming
  • frightening thoughts

Around half of all sufferers experience frightening thoughts of harming their baby. These thoughts are part of the condition, and do not mean you are a bad mother. It is rare for either mother or baby to be harmed as a result of postpartum depression.

Diagnosis and treatment

If you think you may be experiencing postpartum depression, you should contact your healthcare provider immediately. Your healthcare provider will be able to diagnose the condition by asking a series of questions. Some women are scared to seek help because they worry that their babies will be taken from them. In reality it is very, very rare for babies to be taken from their mothers because of postpartum depression. This would only ever occur in very exceptional circumstances.

Your healthcare provider is best placed to advise you on treatment options, and this will depend on the severity of your condition. Treatment options include:

  • counseling and therapy
  • medication

There are things you can do to help alleviate the symptoms of postpartum depression, for example:

  • talk about how you feel – whether it’s to your partner, friends, family or a group for sufferers, talking about your feelings may help
  • exercise – this is a proven way to treat depression, so try to exercise a few times a week
  • get out of the house – if you’re feeling low and want to hide indoors, try to force yourself to leave the house. Even just taking a quick stroll around the block can help
  • eat healthily – skipping meals and eating poorly can make you feel worse, so try to eat a healthy balanced diet
  • rest – get as much sleep as you can. If you can’t sleep, rest instead
  • accept help from friends and family

It can be hard to admit you are suffering from postpartum depression, and telling other people about it can be even harder. Try to remember, telling your healthcare provider is the first step on the road to recovery.

Written by Fiona, proud owner of a toddler, @fiona_peacock

This information is not intended to replace the advice of a trained medical doctor. Health & Parenting Ltd disclaims any liability for the decisions you make based on this information, which is provided to you on a general information basis only and not as a substitute for personalized medical advice. All contents copyright © Health & Parenting Ltd 2018. All rights reserved.

Carpal Tunnel Syndrome in Pregnancy

Carpal tunnel syndrome is a common condition. Around half of all women will experience carpal tunnel syndrome in pregnancy. This condition causes tingling, numbness and pain in the hands and fingers. Carpal tunnel syndrome can affect the whole hand, but is most commonly felt in the thumb, index finger, middle finger and half of the ring finger.

The condition occurs when the nerve that controls sensation and movement in the hands (the median nerve) is compressed. During pregnancy, you carry excess fluids. These fluids accumulate in your body tissues, and may cause swelling. This swelling is thought to cause carpal tunnel syndrome in pregnancy.

Symptoms of carpal tunnel syndrome in pregnancy

The symptoms may start gradually and slowly worsen as the pregnancy progresses. During the third trimester, as your body swells more, you may find your symptoms worsen slightly. The symptoms of carpal tunnel syndrome tend to be worse at night. Symptoms include:

  • tingling in the hands and fingers
  • numbness in the hands and fingers
  • pain in the hands and fingers
  • pins and needles
  • weakened grip
  • dull ache in the arm or wrist

How to ease carpal tunnel syndrome in pregnancy

The following tips may be useful to relieve the discomfort caused by this condition:

  • avoid repetitive hand and wrist movements
  • avoid sleeping on your hands
  • flex, shake and move your hands when tingling occurs
  • change arm and wrist positions regularly
  • acupuncture

Speak to your healthcare provider

If the pain is stopping you from sleeping, or interfering with your everyday life, you should speak to your healthcare provider. They may recommend a B6 supplement. You should not start taking a B6 supplement without first speaking to your healthcare provider.

If your condition is severe, your healthcare provider may recommend ultrasound therapy to ease your discomfort. If your symptoms worsen at night and prevent you from sleeping, a wrist splint may be recommended.

When will it end?

As your body returns to its normal state after the birth, you should find your symptoms disappear. Most women find that they are no longer suffering from carpal tunnel syndrome three months after the birth.

If you are still experiencing symptoms a year after the birth, you should speak to your healthcare provider. You may need treatment to reduce the symptoms. Steroid injections are often used to reduce inflammation. In rare cases, a surgical procedure may be needed to reduce compression of the median nerve.

Written by Fiona, proud owner of a toddler, @fiona_peacock

This information is not intended to replace the advice of a trained medical doctor. Health & Parenting Ltd disclaims any liability for the decisions you make based on this information, which is provided to you on a general information basis only and not as a substitute for personalized medical advice. All contents copyright © Health & Parenting Ltd 2018. All rights reserved.

DIY Birth Photography Tips

The birth of a child is a very special and life-changing experience, and the moment you first meet your baby is one you will want to remember forever. If professional birth photography is out of your budget, but you would like the birth to be captured, you could ask your birth partner to take on the role of photographer. Or, if you’d rather keep your birth partner available to you, you could ask a close friend or family member to capture the vital moments on film. Whoever you choose, here are some tips to help them get the most out of DIY birth photography:

1. Use the best camera you can get your hands on – if you have or can borrow a top of the range camera, that’s great. If not, get hold of the best camera phone or digital camera you can.

2. Practice makes perfect – whatever camera you use, make sure you are well-acquainted with it before the birth. Make sure you understand what each and every button does, and how to find the right setting for your location. You don’t want to miss taking the all-important photograph because you were pressing the wrong button.

3. Have it set up before you need it – if you are using a fancy camera, make sure it is set up in advance. It may take you a while, fiddling with the ISO and other settings, before you can get pictures you’re happy with. Do this in advance, so that when the moment comes, you’re ready. If there is a lot of natural light in the birthing room, you may need to adjust your camera setting as the day progresses. The right setting at noon, will be very different to the setting needed at midnight.

4. Ask for the ground rules – your job is to capture the birth, not to risk upsetting the labouring woman by zooming in on the crowning shot. Ask the couple what they would like you to capture. Do they want photographs of the labour itself, the moment of childbirth, or just the first cuddles with their baby? Does she want it to be a strictly above-the-bump affair, or is she happy for you to capture the entire scene?

5. Adapt, and fast – no matter what ground rules you had, people are free to change their mind. If the capture-everything woman is now screaming at you to go away, then you should. But hang around, she might change her mind when the baby arrives, and she wants some special photographs.

6. Don’t get in the way – there will be healthcare providers with jobs to do, so make sure you’re not in the way. Most hospitals will be happy for you to be there, until you start getting under their feet, and then they’ll quickly tell you to leave. Stay out of the way, and try to shoot as a fly on the wall.

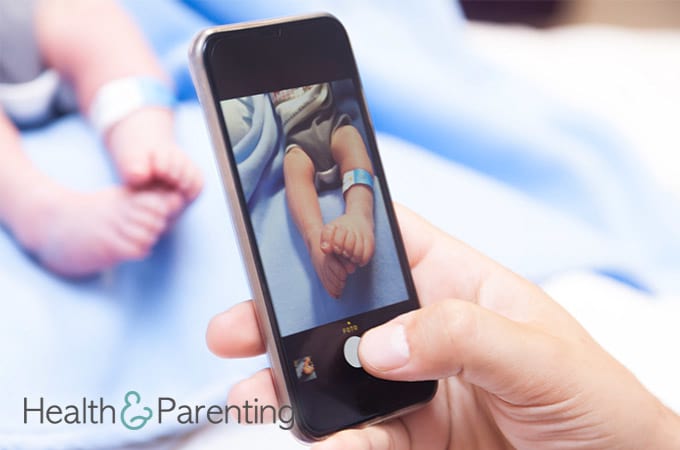
7. Photograph the details – it’s not just the photos of the first family cuddle, it’s also the little memories that are great to look back on. The tiny hospital band wrapped around the ankle of a newborn, the mother-to-be receiving a much-needed back massage from her birth partner, and a few establishing shots of the room itself, with the door number visible.

8. Save them immediately – take your laptop with you, so you can upload the photos straight away. It’s not worth risking a lost laptop case or corrupt memory card, just do it while you’re at the hospital to be safe. This has the added benefit of giving you a laptop to keep yourself occupied if you have a long wait at the hospital.

Who will be taking the first photos of you with your newborn baby?

You can also use our Baby+ App for iPhone / iPad or Android to capture your baby’s milestones and unforgettable moments, or use the App to create a time-lapse video by taking a picture of your baby every day. The App will then automatically produce a beautiful video. Click Baby+ iOS or Baby+ Android to install the App, and prepare for the arrival of your little one(s).

Written by Fiona, proud owner of a toddler, @fiona_peacock

This information is not intended to replace the advice of a trained medical doctor. Health & Parenting Ltd disclaims any liability for the decisions you make based on this information, which is provided to you on a general information basis only and not as a substitute for personalized medical advice. All contents copyright © Health & Parenting Ltd 2018. All rights reserved.
Five Fun Baby Shower Games

If you’re charged with organising a friend’s baby shower, you’re probably feeling the pressure. Fear not, we’re here to help. We’ve come up with a list of fun baby shower games that will please even the most bloated, exhausted and achy mum-to-be!

  1. Decorate the bump – All you need for this game is some organic toxin-free face paints, and the bump of your mum-to-be. Nominate the most creative party guest to do the painting, and don’t let the mum-to-be see until it’s finished. From simple designs like flowers, hearts and stars, to mind-blowing masterpieces, the bump makes a great canvas for whatever you can muster. Be sure to take lots of photos.
  2. Guess the baby food – this is a classic baby shower game. All you need is a selection of pureed baby foods, some spoons and a blindfold. Party guests have to try the food, and then guess the flavour. Offer prizes to get the competitive juices flowing. Be warned though, baby purees are not that tasty!
  3. Baby pictionary – this game is pretty straightforward. You’ll need a whiteboard or flipchart paper and appropriate pens. Replace the usual pictionary cards with baby-related words and activities. Split the party into two teams (or more, if it’s a large shower), and play pictionary. Allow one minute per go, and one go per person. This game will get people out of their seats.
  4. Pass the poop – for this game you’ll need nappy changing supplies, music, dolls and a collection of dirty nappies/diapers. Don’t worry – they’re only pretend dirty nappies/diapers. Fill them with foods that look like baby poop, such as marmite, melted chocolate and peanut butter. Play pass the parcel. When the music stops, whoever is left holding the baby, has two minutes to change the nappy. Make sure you time them – and no prize if they’re too slow or do a sloppy job.
  5. Guess who – this game needs some advanced planning. You’ll need to print out a baby picture and a recent photograph of each shower guest. Split the party into two groups, and make sure they have the photos of the opposite team. Ask each team to pair up the recent photograph with the correct baby photo. Use a timer and don’t give them long to decide. The winning team gets a prize. This is a fun game, especially if not all of the shower guests know each other.

If the mum-to-be has a favourite game, you could customise it to make it baby-shower friendly. Even a typical drinking game such as “I have never” can be adapted to fit around a baby theme. You just have to take out any alcohol related aspects!

It’s the little details that really make baby showers memorable. You could make the mum-to-be a coupon book of pledges. Ask each party guest to pledge something. For example, a pledge to clean her bathroom, or babysit one evening, or cook her a meal. Just something little each person could do, to help her adapt to life as a new mum.

Throwing a baby shower is a great way to help your friend prepare for impending motherhood. It gives her a chance to see all of her friends, and have fun. It also shows her how many people care about her, so she knows she has a support system in place for when the baby arrives.

Written by Fiona, proud owner of a toddler, @fiona_peacock

This information is not intended to replace the advice of a trained medical doctor. Health & Parenting Ltd disclaims any liability for the decisions you make based on this information, which is provided to you on a general information basis only and not as a substitute for personalized medical advice. All contents copyright © Health & Parenting Ltd 2018. All rights reserved.

Considering Cord Blood Banking

Throughout pregnancy, blood travels between the baby and placenta through the pulsating umbilical cord. Immediately after the birth, this pulsating occurs for between two and five minutes; and, by the end of the process, your baby should have more blood in his body than he did when he was born.

Cord blood banking

Cord blood banking is the process of collecting blood left in the umbilical cord, and storing it for use in future medical procedures. The blood is valuable because it is a rich source of stem cells. Stem cells have the potential to become many different types of cells. This means they can be used to treat diseases, and repair tissues and organs.

Research into cord blood stem cells is ongoing. So far, the cells have been successfully used to treat over 70 diseases including leukemia, Hodgkin’s disease, non-Hodgkin’s lymphoma and aplastic anemia. The cells can also be used to treat rare metabolic disorders in infants.

The blood can be donated to a public cord blood bank – who will store the blood until it is needed by a member of the public much like a blood bank – meaning you could potentially save a life. As many as 70% of patients in need have no family match and must wait for donor blood to become available. Or, you can pay to have the blood stored at a private cord blood bank who will keep the blood for use only by your family.

Cord blood collection

The blood is collected immediately after the birth. It is a painless procedure, and is considered to be safe for both you and your newborn baby. If you have chosen to have the cord clamped and cut in the usual way, the blood will be taken then. Once your baby’s umbilical cord is clamped, a needle will be inserted into the part of the umbilical cord still attached to the placenta. The needle will not go near your baby. Up to five ounces of blood will be collected, and this could take up to 10 minutes. During this time, you will probably be having your first cuddles with your newborn baby.

If you have chosen to delay cord clamping, the procedure will wait until the cord has finished pulsating. Once the cord has been cut, the remaining blood can be collected immediately for banking.

The blood is then sent for testing at the cord blood bank. The cells that are found to be potentially useful, are frozen at -180C, and can be stored for up to 20 years.

Is it best to treat a patient using their own stem cells?

When using a patient’s own stem cells, the body will not reject the cells or react against them. However, if the body was making the wrong cells, and this is what caused the illness, then it is considered too risky to use the patient’s own cells.

Because the research into stem cells is in it’s infancy, the full potential of cord blood is not yet known. In fact, the science hasn’t yet caught up, meaning it could be a while until the full potential of cord blood is unlocked.

Around 5% of parents now bank the blood of their newborns. The overwhelming majority of this blood goes to private family banks to be stored for family use, but 10% of it is donated to public banks. In the US,  there are 185,000 units of cord blood in public banks.

In the UK, the Human Tissue Authority (HTA) licenses all private and public cord blood banks. They have published a guide for parents outlining questions you should ask, as well as how to interpret the results provided by the cord blood bank after collection. In the US, the Department of Health and Human Services maintains a website with information about both public and private cord blood banking.

If you think you might be interested in donating your baby’s cord blood, or banking it for private use, speak to your healthcare provider about local resources for cord blood collection and storage.

Written by Fiona, proud owner of a toddler, @fiona_peacock

This information is not intended to replace the advice of a trained medical doctor. Health & Parenting Ltd disclaims any liability for the decisions you make based on this information, which is provided to you on a general information basis only and not as a substitute for personalized medical advice. All contents copyright © Health & Parenting Ltd 2018. All rights reserved.

How to Avoid Heartburn During Pregnancy

One in five women experience heartburn during the first trimester, and this number rises to two in five by the end of the second trimester. By the end of the pregnancy, over three in five women will have experienced at least some heartburn and indigestion.

So, chances are, you’re going to experience it – the bloating, the nausea, the wind, the burping, and that horrible taste in your mouth. Heartburn is definitely up there amongst the most hated common pregnancy symptoms.

What causes heartburn during pregnancy?

In early pregnancy, heartburn is caused by hormones. Progesterone slows digestion down to a snail’s pace, and causes the muscle valve between the stomach and oesophagus to relax. Once the valve is relaxed, stomach acid can leak into oesophagus, causing heartburn.

Later in the pregnancy, you can blame your growing uterus for this unpleasant symptom. The uterus can push the stomach higher in your body, forcing stomach acid into the oesophagus.

After the birth, as your hormone levels decrease, and your uterus shrinks back down, you should find that the heartburn disappears. In the meantime, however, there are some things you can do to try and avoid heartburn during pregnancy:

1. Reduce your intake of citrus foods – oranges, lemons, tomatoes and grapefruits can all worsen the symptoms of heartburn. Citrus foods are acidic, and eating them can increase acidity in the stomach, which can worsen heartburn when stomach acid escapes into the oesophagus.

2. Avoid fried and fatty foods – food that takes a long time to digest, stays in your stomach for longer, thus allowing more time for heartburn to occur after a meal. Try to avoid eating fried and fatty foods that will sit in your stomach for a long time, and instead eat healthy and easy-to-digest foods.

3. Avoid caffeine – tea, coffee, soda and chocolate all contain caffeine which can worsen the effects of heartburn.

4. Try cutting out garlic and onion – some people find that these foods can make heartburn worse. Try cutting them out to see if it makes a difference.

5. Try cutting out spicy food – some people find that spicy foods worsen the symptoms of heartburn. Try avoiding foods with chilli, peppers or hot spices in them, and see if your heartburn improves.

Try keeping a food diary, and noting what you eat and when. Add to this details of when you suffer from heartburn, and how badly. By comparing this information, you should be able to identify which foods are safe to eat, and which worsen your symptoms.
How do you deal with heartburn?

Written by Fiona, proud owner of a toddler, @fiona_peacock

This information is not intended to replace the advice of a trained medical doctor. Health & Parenting Ltd disclaims any liability for the decisions you make based on this information, which is provided to you on a general information basis only and not as a substitute for personalized medical advice. All contents copyright © Health & Parenting Ltd 2018. All rights reserved.

How to Bond With Twins

Most parents worry about whether they will bond with their baby, but this is especially true for parents expecting twins or more. It’s understandable to be a little freaked out by the news that you are expecting two or more babies, and bonding may be just one of your worries at the moment. Here are some tips to help prepare you for the process of bonding with twins or more:

1. Be prepared – life as a new mum is tough, and all new parents should prepare for sleepless nights. As a mum of twins, you may find yourself severely lacking in time. Unfortunately, there’s not much you can do about this. New babies are needy, and you’ll have two of them. Fill your freezer with food, stock up the pantry, and make sure you have enough essentials to last a few weeks.

2. Look after yourself – you need to take care of yourself as well as your babies. If you’re exhausted, emotional, hormonal and lacking in confidence, you may end up doubting your mothering abilities. If you feel like you need some time to yourself, ask your partner or a friend to watch the babies. Run a bath, lock the bathroom door and settle down for some good quality relaxation time. You’ll emerge refreshed and better able to care for both of your babies.

3. Have help on standby – you have no doubt been inundated with offers from potential babysitters, so make sure you cash them in. Ask a trusted friend or family member to take one of the babies for a walk, so that you can grab some quality bonding time with the other baby. Alternate babies each time, and make sure they each get a fair share of your time.

4. Hibernate – new mums are so busy showing off their babies, they sometimes forget to take the time to bond. Spend some time locked away as a family, getting to know each other and adjusting to your new role. Cuddle both your babies, and chat to them as you make eye contact.

5. Strip off – skin to skin is a great way to bond with your babies. Have your babies in just their nappies, and lie them on your bare chest.

6. Tandem carries – babywearing isn’t just for singleton parents, you can carry your twins, too. There are lots of different options available – woven and stretchy wraps are popular choices – so try a few carriers out before you buy. If there’s a sling library near you, ask for a consultation to help you find a carrier you love and to learn how to put two babies in two slings!

7. Make the most of it – it might be a nappy change or a feed, but make the most of the time together. Instead of rushing your way through one dirty nappy to get to the other, spend some time singing to and chatting with your baby. Make sure each baby gets special attention from you during these everyday tasks.

8. Give it time – bonding with a baby takes time, and you have twice the babies or half the time, so don’t worry if bonding takes longer than you expected. The first few weeks might be spent rushing from one baby to another, making sure they’re both ok, but sooner or later you will have more time for bonding.

9. Let the guilt go – it’s not uncommon for twin parents to report feeling guilty for not spending enough time with each baby. Let this guilt go. Don’t compare yourself to your singelton parent friends. Parenting twins is a totally different ballgame.

Written by Fiona, proud owner of a toddler, @fiona_peacock

This information is not intended to replace the advice of a trained medical doctor. Health & Parenting Ltd disclaims any liability for the decisions you make based on this information, which is provided to you on a general information basis only and not as a substitute for personalized medical advice. All contents copyright © Health & Parenting Ltd 2018. All rights reserved.
What is Placental Abruption?

Placental abruption is a condition in which the placenta separates from the lining of the uterus before birth. Placental abruption occurs in around one per cent of pregnancies. Placental abruption can occur at any time after week 20, although it is most common during the final trimester.

Causes of placental abruption

The exact cause of placental abruption has not yet been identified. However, studies have linked placental abruption to the following risk factors:

  • Smoking
  • Cocaine use
  • Abdominal injury
  • High blood pressure
  • Bleeding during early pregnancy
  • Advanced maternal age

If you have experience placental abruption during a previous pregnancy, you have an increased risk of developing the condition again.

Placental abruption can be a serious condition for both mother and baby. There is an increased risk of premature birth, stillbirth and death within the first 28 days of life. If undiagnosed, a minor abruption could lead to fetal growth problems as the baby is starved of oxygen and nutrients.

Symptoms of placental abruption

Common symptoms of this condition include:

  • Vaginal bleeding
  • Frequent contractions
  • Abdominal pain
  • Back pain
  • Reduced fetal movements

If you are experiencing any of the above, you should contact your healthcare provider immediately. You should go straight to hospital if you are losing a lot of blood and feel faint.

Diagnosis of placental abruption

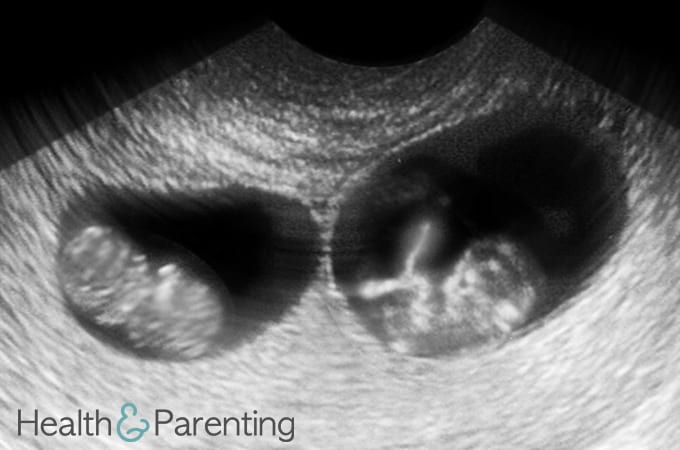
The doctor will examine your abdomen, and monitor any contractions you may be experiencing. If you are experiencing vaginal bleeding, an internal examination will be performed. An ultrasound scan may be carried out to inspect the placenta more closely.

The baby’s heartbeat will be monitored during your hospital stay. It is important for the doctors to know whether the baby is in distress.

If you have lost a lot of blood on your arrival at the hospital, the examinations above will be delayed until your condition is stable. You will be given fluids, oxygen and, if necessary, a blood transfusion.

Treatment of placental abruption

Minor abruptions may require little more than an overnight stay in hospital. Once the doctor is happy that you and the baby are in good health, you will be discharged and told to return if further bleeding occurs.

If greater placental separation has taken place, you may be required to remain in hospital until the birth. Placental abruption can be life threatening for both mother and baby, so your doctor won’t take any chances with this condition. If the doctor considers your baby too young to be born, you will be admitted to hospital long term.

If you are close to your due date, immediate delivery may be the preferred option. This may be done by induction or, if necessary, caesarean section.

Prevention of placental abruption

To reduce the risk of you developing this condition, you should avoid smoking and drugs for the duration of the pregnancy (something you should avoid at all times anyway). You should attend all antenatal appointments to allow continuous monitoring of your blood pressure, and the baby’s gestational growth, as these can be early warning signs of the condition.

Written by Fiona, proud owner of a toddler, @fiona_peacock

This information is not intended to replace the advice of a trained medical doctor. Health & Parenting Ltd disclaims any liability for the decisions you make based on this information, which is provided to you on a general information basis only and not as a substitute for personalized medical advice. All contents copyright © Health & Parenting Ltd 2018. All rights reserved.

Pregnancy Photography: Capturing Memories

At the moment, you are eating, breathing and (not) sleeping pregnancy, but one day it will be a distant memory. As those nine months edge slowly by, you may struggle to remember what life was like before pregnancy. I mean, what do your knees actually look like anyway? Once it’s over, however, you’ll think back and find it hard to believe just how big your bump got.

One way to make sure you never forget is to use photography to capture the pregnancy for you. The photographs will last a lifetime, and the photo shoot will be a great way to celebrate your pregnant body. You may not be all too fond of it now, but you might find yourself looking back in amazement one day.

Here are some tips to help you get photographs to be proud of:

1. Use a professional – if you want professional photographs, use a professional photographer. A professional will have all of the camera, lighting and editing equipment to make sure your pictures turn out perfect. Choose a photographer you feel comfortable with, and whose photography style you love.

2. Wait until your seventh month – experts say this is the ideal time for a pregnancy photo shoot. If you wait much longer, you might find yourself feeling swollen, bloated, stretched and uncomfortable. Any earlier and you may not have much of a bump to photograph.

3. Have your hair done – get your hair and makeup done before the shoot. If you’re on a budget, ask a friend to do them for you. Having your hair and makeup done will help to make sure you look your best, and will also help to boost your confidence in front of the camera.

4. Wear something special – you need to feel comfortable on the day, so wear something you love for the photo shoot. Whether you’re wearing a maxi dress, a nightgown, or going nude, make sure you feel beautiful in what you wear.

5. Make sure it’s ‘you’ – if you’re not the kind of person who wants a photograph of your topless husband hugging your bump, don’t do it. The photograph should reflect your personality, so make sure your photographer knows what you want. Whether it’s romantic, cheesy, cute or quirky, make sure you take photographs you will want to frame.

6. Make it personal – the best way to make a photo shoot personal, is to shoot it in your house. Many photographers will be happy to come out to your home and shoot the photographs there. If space won’t allow that, take some props with you to the studio. Whether it’s something you’ve bought for the baby, the scan photo, or just some bits and pieces from around the home, take them in. Your photographer will be able to come up with ways to incorporate the props, and make the photo shoot unique to you.

7. Get some silhouette shots – the silhouette of a bump is always beautiful, so make sure you get a few photos of this. If you’re feeling self conscious about your face or body, the silhouette shots may end up being your favourites.

8. Make it a family affair – if you have children, get them involved in the photo shoot. There are lots of cute ways to get kids involved, some couples choose to have their hand prints painted on the bump. If your pets are your family, invite them along too. Muddy paw prints are another cute bump decoration.

9. Get follow ups taken – if you love the photographs, and enjoyed working with the photographer, book for some follow-ups for after the baby arrives. Using the same photographer will allow for continuity between the two shoots.

Are you having a pregnancy photo shoot?

Written by Fiona, proud owner of a toddler, @fiona_peacock

This information is not intended to replace the advice of a trained medical doctor. Health & Parenting Ltd disclaims any liability for the decisions you make based on this information, which is provided to you on a general information basis only and not as a substitute for personalized medical advice. All contents copyright © Health & Parenting Ltd 2018. All rights reserved.